yum 安装
centOS 8 - PHP 8
sudo dnf -y install https://dl.fedoraproject.org/pub/epel/epel-release-latest-8.noarch.rpm
sudo dnf -y install https://rpms.remirepo.net/enterprise/remi-release-8.rpm
sudo dnf -y install yum-utils
sudo dnf module reset php
sudo dnf module install php:remi-8.0 -y
sudo dnf install php -y
安装其他扩展: sudo yum install php-xxx
常用扩展
bcmath
bz2
calendar
Core
ctype
curl
date
dom
exif
fileinfo
filter
ftp
gettext
hash
iconv
igbinary
json
libxml
mbstring
msgpack
mysql
mysqli
mysqlnd
openssl
pcntl
pcre
PDO
pdo_mysql
pdo_sqlite
Phar
readline
redis
Reflection
session
SimpleXML
sockets
sodium
SPL
sqlite3
standard
tokenizer
xml
xmlreader
xmlwriter
xsl
Zend OPcache
zip
zlib
centos 7
sudo yum -y install https://dl.fedoraproject.org/pub/epel/epel-release-latest-7.noarch.rpm
sudo yum -y install https://rpms.remirepo.net/enterprise/remi-release-7.rpm
sudo yum -y install yum-utils
sudo yum-config-manager --disable 'remi-php*'
sudo yum-config-manager --enable remi-php80
sudo yum -y install php php-{cli,fpm,mysqlnd,zip,devel,gd,mbstring,curl,xml,pear,bcmath,json}
参考文档:
CentOS 8 - PHP 7.4
暂时先记着,这种方法不是很懂,建议源码安装
# 添加源
rpm -Uvh https://dl.fedoraproject.org/pub/epel/epel-release-latest-8.noarch.rpm
rpm -Uvh http://rpms.remirepo.net/enterprise/remi-release-8.rpm

# 启用remi模块安装
dnf -y install dnf-utils

# 查找
yum search php74*

# 安装
yum install php74-php

# 通过grep查找扩展
yum search php74* | grep swoole

# 安装扩展
yum install php74-php-pecl-swoole4

# 链接文件
ln -s /opt/remi/php74/root/usr/bin/php   /usr/bin/php
Centos 7 -- php 7.4
https://www.cnblogs.com/lizexiong/p/16930833.html
CentOS 7 -- PHP 7.0、7.1
# 安装epel-release
yum -y install epel-release

# 获取PHP7的yum源
rpm -Uvh https://mirror.webtatic.com/yum/el7/webtatic-release.rpm

# 安装php7.1
yum -y install php71w

# 安装扩展,以下列出的基本满足大部分情况,后续可以再继续yum安装
yum install php71w.x86_64 php71w-bcmath.x86_64 php71w-cli.x86_64 php71w-common.x86_64 php71w-dba.x86_64 php71w-devel.x86_64 php71w-embedded.x86_64 php71w-enchant.x86_64 php71w-fpm.x86_64 php71w-gd.x86_64 php71w-imap.x86_64 php71w-ldap.x86_64 php71w-mbstring.x86_64 php71w-mcrypt.x86_64 php71w-mysqlnd.x86_64 php71w-odbc.x86_64 php71w-opcache.x86_64 php71w-pdo.x86_64 php71w-pdo_dblib.x86_64 php71w-pear.noarch php71w-pecl-apcu.x86_64 php71w-pecl-apcu-devel.x86_64 php71w-pecl-imagick.x86_64 php71w-pecl-imagick-devel.x86_64 php71w-pecl-mongodb.x86_64 php71w-pecl-redis.x86_64 php71w-pecl-xdebug.x86_64 php71w-pgsql.x86_64 php71w-xml.x86_64 php71w-xmlrpc.x86_64 nginx php71w-intl -y php71w-mysqlnd.x86_64
# 验证版本
php -v
备注:将以上所有的php71w换成php70w,就是安装php7.0
CentOS 7 -- PHP 5.4 --> 5.6
因为一般yum官网安装的是php 5.4 所以会有升级到5.6这个版本的需要
一、查看当前版本 php -v
二、列出所有安装的PHP软件包 rpm -qa|grep php
三、卸载所有安装的PHP软件包--卸载一律从下往上卸载,如果你是yum安装的,可以用yum一键卸载 yum remove php-commo
四、升级升级yum仓库
rpm -Uvh https://mirror.webtatic.com/yum/el7/epel-release.rpm
rpm -Uvh https://mirror.webtatic.com/yum/el7/webtatic-release.rpm
五、安装php5.6和扩展
yum install -y php56w php56w-opcache php56w-xml php56w-mcrypt php56w-gd php56w-devel php56w-mysql php56w-intl php56w-mbstring
六、如果你服务器上面想要运行nginx的话,还需要安装php-fpm 5.6
# 添加 EPEL源
yum install epel-release
rpm -Uvh http://rpms.famillecollet.com/enterprise/remi-release-7.rpm

# 安装nginx
yum -y install nginx

# 安装 php-fpm 5.6
yum --enablerepo=remi --enablerepo=remi-php56 install php php-fpm

# 或者
yum --enablerepo=remi install php php-fpm

# 启动php-fpm
systemctl start php-fpm 或 systemctl start php-fpm

# 重启nginx
systemctl restart nginx
七、查看PHP版本 php -v
其他系统一键安装
都差不多
Ubuntu:
apt install php8.1-cli
apt install php8.1-zip php8.1-curl php8.1-bcmath
源码安装PHP7.4
CentOS 不同版本基本思路都是一样的,介绍一种即可
备注:可能会源码安装多个版本的PHP,所以我将源码包放在
/usr/local/php_package下,安装在/usr/local/php7.x下,通过软链去选择版本,更好的办法是修改 php-fpm 端口
# 先更新软件包
yum -y update
apt-get upgrade

# 去官网下载你需要的版本
wget https://www.php.net/distributions/php-7.4.7.tar.gz

# 如果提示证书问题
wget --no-check-certificate https://www.php.net/distributions/php-7.4.7.tar.gz

# 安装编译所需要的扩展,如果你安装的 PHP 版本过高,可能很多扩展需要升级,原则就是:编译报什么错,就装什么
yum install libxml2-devel libxml2 sqlite-devel sqlite openssl-devel openssl libcurl-devel libcurl libc-client-devel libsodium libsodium-devel libzip libzip-devel

# 解压
tar -zxvf php-7.4.7.tar.gz

# 进入安装目录
cd php-7.4.7/

 ./configure --prefix=/usr/local/php7.4 \
--with-config-file-scan-dir=/usr/local/php7.4/etc \
--with-mhash     \
--with-pdo-mysql     \
--with-mysqli     \
--with-openssl     \
--enable-calendar     \
--with-imap \
--with-kerberos  \
--with-imap-ssl \
--with-zlib     \
--enable-shared     \
--enable-bcmath     \
--enable-shmop     \
--enable-sysvsem     \
--enable-sysvshm     \
--enable-mbstring     \
--enable-ftp     \
--enable-pcntl     \
--enable-sockets     \
--with-xmlrpc     \
--enable-soap     \
--with-gettext     \
--with-curl     \
--enable-fpm     \
--with-pear     \
--enable-fast-install     \
--disable-fileinfo     \
--with-sodium \
--with-zip
部分配置简单描述
| 配置项 | 说明 | |
|---|---|---|
| ./configure --prefix=/usr/local/php7.4 | 安装目录 | |
| --with-config-file-scan-dir=/usr/local/php7.4/etc | 设置扫描配置文件的路径 | |
| --with-mhash | 包括mhash支持 | |
| --with-pdo-mysql | PDO:MySQL支持,缺省路径代表将使用MySQL本机驱动程序 | |
| --with-mysqli | 包括MySQLi支持,缺省路径代表将使用MySQL本机驱动程序 | |
| --with-pdo-pgsql | PDO:PostgreSQL支持。DIR是PostgreSQL基本安装目录或pg_config的路径 | |
| --without-pdo-sqlite | PDO:sqlite 3支持。 | |
| --with-pgsql | 包括PostgreSQL支持。DIR是PostgreSQL基本安装目录或pg_config的路径 | |
| --with-openssl | 包括OpenSSL支持(需要OpenSSL>=1.0.1) | |
| --enable-calendar | 启用日历转换支持 | |
| --with-imap | 包括IMAP支持。DIR是c-client安装前缀 | |
| --with-kerberos | IMAP:包括Kerberos支持 | |
| --with-imap-ssl | IMAP:包括SSL支持 | |
| --with-zlib | 包括ZLIB支持(需要ZLIB>=1.2.0.4) | |
| --enable-shared | 生成共享库,默认设置为“是” | |
| --enable-bcmath | 启用bc样式的精度数学函数 | |
| --enable-shmop | 启用shmop支持 | |
| --enable-sysvsem | 启用sysvsem支持 | |
| --enable-sysvshm | 启用sysvshm共享内存支持 | |
| --enable-mbstring | 启用多字节字符串支持 | |
| --enable-ftp | 启用FTP支持 | |
| --enable-pcntl | 启用pcntl支持(仅限CLI/CGI) | |
| --enable-sockets | 启用sockets支持 | |
| --with-xmlrpc | 包括XMLRPC-EPI支持 | |
| --enable-soap | 启用SOAP支持 | |
| --with-gettext | 包括GNU gettext支持 | |
| --with-curl | 启用 curl 支持 | |
| --enable-fpm | 启用 fpm SAPI 可执行文件 | |
| --with-fpm-user | 指定 fpm 用户 | |
| --with-fpm-group | 指定 fpm 用户组 | |
| --with-pear | pecl | |
| --with-gdbm | DBA:GDBM支持 | |
| --enable-fast-install | 优化快速安装,默认值 yes | |
| --disable-fileinfo | 禁用fileinfo支持 | |
| --with-sodium | 包含 sodium 支持 |
配置常见错误,简单解决就是:缺啥装啥
如果已经安装了,可是还是提示未找到包,就需要做个软链,比如这个 ln -s /usr/lib64/libc-client.so /usr/lib/libc-client.so
遇到缺少的库,一般这么解决 sudo apt-get install lib******-dev、(***** 一般是库名), 不知道名字的,lib + ** + 按两下 tab 键,找到后缀是 - dev 的安装
- configure: error: Package requirements (libxml-2.0 >= 2.7.6) were not met: 解决:
# Centos 系统
yum install libxml2-devel libxml2

# Ubuntu 系统
apt-get install libxml2 libxml2-dev
apt-get install libxml++2.6-dev

# 编译安装,注意版本
wget http://xmlsoft.org/sources/libxml2-2.9.10.tar.gz
tar -zxvf libxml2-2.9.10.tar.gz
cd libxml2-2.9.10
./configure --prefix=/usr/local/libxml2
make && make install

# 如果出现安装libxml2后还是报这个错,试试编译的时候,手动加上
--with-libxml-dir=/usr/local/libxml2
-
configure: error: Package requirements (sqlite3 > 3.7.4) were not met: 解决:yum install sqlite-devel sqlite
-
configure: error: utf8_mime2text() has new signature, but U8T_CANONICAL is missing. This should not happen. Check config.log for additional information 解决:apt-get install libc-client-dev
-
configure: error: Package requirements (openssl >= 1.0.1) were not met: 解决:yum install openssl-devel openssl
-
configure: error: DBA: Could not find necessary header file(s). 解决:因为启用了这个,本机找不到,这个是一个小型数据库,一般不会用,不启用这就行
-
configure: error: utf8_mime2text() has new signature, but U8T_CANONICAL is missing. This should not happen. Check config.log for additional information. 解决:yum install -y libc-client-devel
-
No package 'libpng' found 解决:yum install libpng-devel
-
configure: error: Cannot find imap library (libc-client.a). Please check your c-client installation. 解决:
yum install libc-client-devel
ln -s /usr/lib64/libc-client.so /usr/lib/libc-client.so
- configure: error: Package requirements (oniguruma) were not met:Package 'oniguruma', required by 'virtual:world', not found 解决:网络上一堆都是扯淡,自己根本没尝试过,就到处复制,哎,这个大环境啊,下面是我的解决办法(去GitHub看最新包)
# 先安装 apt-get install libonig-dev,如果不行就下面手动安装

wget https://github.com/kkos/oniguruma/releases/download/v6.9.5_rev1/onig-6.9.5_rev1.tar.gz
tar -zxvf onig-6.9.5_rev1.tar.gz
cd onig-6.9.5/
./configure --prefix=/usr --libdir=/lib64
make
make install
-
configure: error: Cannot find libpq-fe.h. Please specify correct PostgreSQL installation path 解决:要不你自己装这个数据库,要不就不要配置这个参数,就这样
-
configure: error: Package requirements (libsodium >= 1.0.8) were not met: 解决:yum install libsodium libsodium-devel
-
configure: error: Package requirements (libzip >= 0.11) were not met: 解决:yum -y install libzip libzip-devel 如果上面没解决,那就
cd
yum remove libzip
wget https://libzip.org/download/libzip-1.2.0.tar.gz
tar -zxvf libzip-1.2.0.tar.gz
cd libzip-1.2.0
./configure
make && make install
export PKG_CONFIG_PATH="/usr/local/lib/pkgconfig/"
历经千辛万苦,我终于配置成功了,妈呀,真的不容易啊
编译 && 安装
make

make install
make 如果出现如下错误:
make: *** [sapi/cli/php] Error 1
解决办法:
wget http://ftp.gnu.org/pub/gnu/libiconv/libiconv-1.16.tar.gz
tar -zxvf libiconv-1.16.tar.gz
cd libiconv-1.16
./configure --prefix=/usr/local
make
make install
ln -s /usr/local/lib/libiconv.so.2 /usr/lib64/


#### 如果上面安装了 libiconv 可是 make 还是报错 ####
make clean
make && make install
ln -s /usr/local/lib/libiconv.so.2 /usr/lib64/
make ZEND_EXTRA_LIBS='-liconv'
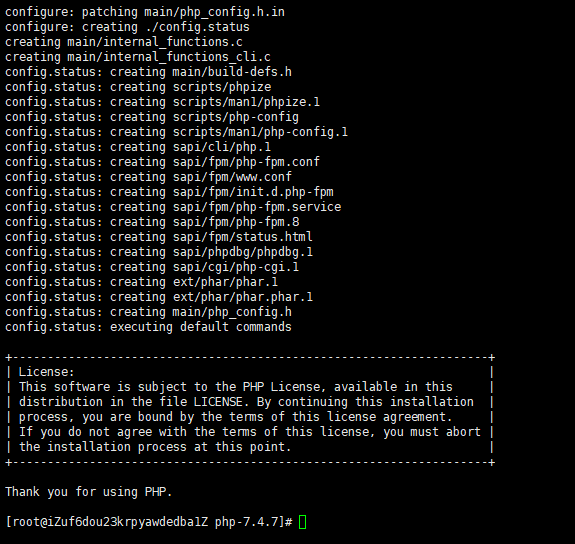
make 成功后信息如下所示:
我这里有个提示,说 phar 未安装,这个可以在编译前去掉,然后在PHP安装完成后再安装这个
Generating phar.php
Generating phar.phar
PEAR package PHP_Archive not installed: generated phar will require PHP's phar extension be enabled.
clicommand.inc
pharcommand.inc
invertedregexiterator.inc
directorytreeiterator.inc
directorygraphiterator.inc
phar.inc

Build complete.
Don't forget to run 'make test'.
make install 成功后信息如下:
[root@rogxbw php-7.4.21]# make install
Installing shared extensions:     /usr/local/php7.4/lib/php/extensions/no-debug-non-zts-20190902/
Installing PHP CLI binary:        /usr/local/php7.4/bin/
Installing PHP CLI man page:      /usr/local/php7.4/php/man/man1/
Installing PHP FPM binary:        /usr/local/php7.4/sbin/
Installing PHP FPM defconfig:     /usr/local/php7.4/etc/
Installing PHP FPM man page:      /usr/local/php7.4/php/man/man8/
Installing PHP FPM status page:   /usr/local/php7.4/php/php/fpm/
Installing phpdbg binary:         /usr/local/php7.4/bin/
Installing phpdbg man page:       /usr/local/php7.4/php/man/man1/
Installing PHP CGI binary:        /usr/local/php7.4/bin/
Installing PHP CGI man page:      /usr/local/php7.4/php/man/man1/
Installing build environment:     /usr/local/php7.4/lib/php/build/
Installing header files:          /usr/local/php7.4/include/php/
Installing helper programs:       /usr/local/php7.4/bin/
  program: phpize
  program: php-config
Installing man pages:             /usr/local/php7.4/php/man/man1/
  page: phpize.1
  page: php-config.1
Installing PEAR environment:      /usr/local/php7.4/lib/php/
[PEAR] Archive_Tar    - installed: 1.4.9
[PEAR] Console_Getopt - installed: 1.4.3
[PEAR] Structures_Graph- installed: 1.1.1
[PEAR] XML_Util       - installed: 1.4.5
warning: pear/PEAR dependency package "pear/Archive_Tar" installed version 1.4.9 is not the recommended version 1.4.4
[PEAR] PEAR           - installed: 1.10.12
Wrote PEAR system config file at: /usr/local/php7.4/etc/pear.conf
You may want to add: /usr/local/php7.4/lib/php to your php.ini include_path
/usr/local/php_package/php-7.4.21/build/shtool install -c ext/phar/phar.phar /usr/local/php7.4/bin/phar.phar
ln -s -f phar.phar /usr/local/php7.4/bin/phar
Installing PDO headers:           /usr/local/php7.4/include/php/ext/pdo/
安装成功,源码文件不要删,后面有空的

# 软链
ln -s /usr/local/php7.4/bin/php /usr/bin/php
ln -s /usr/local/php7.4/bin/phar /usr/bin/phar
ln -s /usr/local/php7.4/bin/php-cgi /usr/bin/php-cgi
ln -s /usr/local/php7.4/bin/php-config /usr/bin/php-config

# 配置文件,先看下安装目录下这三个配置文件有没(有的默认都是带了 default 后缀),默认是有的,没有就从安装包中复制过去
/usr/local/php7.4/etc/php.ini
/usr/local/php7.4/etc/php-fpm.conf
/usr/local/php7.4/etc/php-fpm.d/www.conf

若没有:
cp /usr/local/php_package/php-7.4.7/php.ini-production /usr/local/php7.4/etc/php.ini
配置文件是否需要修改
- 配置文件需要修改的话,就改,不改就默认,这些不用说了吧
# 修改 php-fpm 配置
vim /usr/local/php7.4/etc/php-fpm.conf

;Default Value: none
; 开启后可以平滑重启php-fpm
pid = run/php-fpm.pid

; 设置错误日志的路径,可以默认值
; Note: the default prefix is /usr/local/php7.4/var
; Default Value: log/php-fpm.log, 即/usr/local/php7.4/var/log/php-fpm.log
error_log = log/php-fpm.log

; Log等级,可以默认值
; Possible Values: alert, error, warning, notice, debug
; Default Value: notice
log_level = notice

; 后台运行,默认yes,可以默认值
; Default Value: yes
;daemonize = yes

; 引入www.conf文件中的配置,可以默认值
include=/usr/local/php7.4/etc/php-fpm.d/*.conf


# 修改 www.conf 配置
vim /usr/local/php7.4/etc/php-fpm.d/www.conf

;修改用户和用户组
user = nginx
group = nginx

######开启慢日志。可以默认值
slowlog = log/$pool.log.slow
request_slowlog_timeout = 10s
启动 php-fpm
/usr/local/php7.4/sbin/php-fpm -t        # php-fpm检测配置文件是否正确
/usr/local/php7.4/sbin/php-fpm         # php-fpm启动
kill -INT `cat /usr/local/php7.4/var/run/php-fpm.pid`      # php-fpm关闭
kill -USR2 `cat /usr/local/php7.4/var/run/php-fpm.pid`     #php-fpm平滑重启
测试 php 文件是否解析,经测试,OK,能输出 phpinfo
安装完成后,添加扩展
# 需要先安装 autoconf
yum -y install autoconf

# 进入到源码的扩展包(比如我要安装 GD 库)中,
cd /usr/local/php_package/php-7.4.7/ext/gd

# 执行 phpize,需要强调,如果你本机安装有多个 PHP 版本,请输入你要安装的 PHP 版本的扩展的 phpize 路径,如下所示
/usr/local/php7.4/bin/phpize
# 执行完成后应该如下所示:
Configuring for:
PHP Api Version:         20190902
Zend Module Api No:      20190902
Zend Extension Api No:   320190902

# 执行完 phpize 后,会在当前目录生成 configure 文件,然后执行
./configure --with-php-config=/usr/local/php7.4/bin/php-config
make
make install

# 安装完成后,如下所示,会告诉你装在哪里
Installing shared extensions:     /usr/local/php7.4/lib/php/extensions/no-debug-non-zts-20190902/
Installing header files:          /usr/local/php7.4/include/php/

# 修改 php.ini 启用扩展
vim /usr/local/php7.4/etc/php.ini
# 添加如下信息:
extension=gd.so
extension=fileinfo.so
extension=zip.so

# 重启 php-fpm
kill -USR2 `cat /usr/local/php7.4/var/run/php-fpm.pid`
# 查看是否添加了扩展 php -m
添加 pecl
后续需要通过 pecl 安装扩展时,提示没有找到 pecl 命令。
编译安装 pecl,在编译时就最好直接编译
./configure --prefix=/usr/local/php7.4 --with-pear --with-config-file-path=/usr/local/php7.4/etc

make && make install

安装 Redis 扩展
跟上面步骤一样,只是需要手动下载扩展包,点击去官网
安装 swoole 扩展
注意版本:https://pecl.php.net/package-changelog.php?package=swoole
PHP7.4.7 安装 4.4.2
php8.0.2 安装
官网地址:https://pecl.php.net/package/swoole