PHP开发环境搭建
可以使用 docker 搭建一个 LNMP 镜像包,这个不做介绍
说明:MySQL:8.0.22、PHP:7.4.11、Redis:6.0.8、Nginx:1.19.3、Laravel:6.19.1
使用容器间的互联功能
准备目录文件
mkdir /www
mkdir -p ~/nginx/www ~/nginx/conf ~/nginx/conf/conf.d ~/nginx/logs
mkdir -p ~/redis/data ~/redis/conf
mkdir ~/composer
mkdir ~/mysql
互联一: --link
早期方式,不太建议
一、启动 Redis
docker run --name redis -d -p 6379:6379 -v /root/redis/data:/data -v /root/redis/conf/redis.conf:/etc/redis/redis.conf redis redis-server /etc/redis/redis.conf --appendonly yes
二、启动 MySQL
docker run --name mysql -it -d -p 3306:3306 -e MYSQL_ROOT_PASSWORD=123456 -v /root/mysql:/var/lib/mysql mysql
三、启动 php-fpm 并关联 redis + mysql
docker run --name php-fpm74 -p 9000:9000 -v /root/nginx/www/:/www -d --link mysql:mysql --link redis:redis php:7.4-fpm
四、启动 Nginx
docker run -d -p 80:80 --name nginx --mount type=bind,source=/root/nginx/www,target=/usr/share/nginx/html --mount type=bind,source=/root/nginx/logs,target=/var/log/nginx --mount type=bind,source=/root/nginx/conf/nginx.conf,target=/etc/nginx/nginx.conf --mount type=bind,source=/root/nginx/conf/conf.d,target=/etc/nginx/conf.d --link php-fpm74:php nginx
验证
拉项目
改 Nginx 配置文件
这个配置文件特别需要注意,具体请看 --network 中的配置文件注释部分
重启 Nginx 容器
路由访问
互联二: --network
新建一个网络 docker network create -d bridge my-net
-
-d指定网络类型,有bridge(一般选这个)、overlay(用于 Swarm mode)
一、启动 Redis
docker run --name redis -d -p 6379:6379 --network my-net -v /root/redis/data:/data -v /root/redis/conf/redis.conf:/etc/redis/redis.conf redis redis-server /etc/redis/redis.conf --appendonly yes
二、启动 MySQL
docker run --name mysql -it -d -p 3306:3306 -e MYSQL_ROOT_PASSWORD=123456 -v /root/mysql:/var/lib/mysql --network my-net mysql
三、启动 php-fpm
docker run --name php -p 9000:9000 -v /www:/www -d --network my-net php:7.4-fpm
四、启动 Nginx
docker run -d -p 80:80 --name nginx --mount type=bind,source=/root/nginx/www,target=/usr/share/nginx/html --mount type=bind,source=/root/nginx/logs,target=/var/log/nginx --mount type=bind,source=/root/nginx/conf/nginx.conf,target=/etc/nginx/nginx.conf --mount type=bind,source=/root/nginx/conf/conf.d,target=/etc/nginx/conf.d --network my-net nginx
验证
搞个简单的空框架项目下来
# 启动容器时,挂载的数据卷位置
cd /root/nginx/www

# 克隆一个项目下来,本地以空的 laravel6 为例
git clone xxxxxxxxxx.git
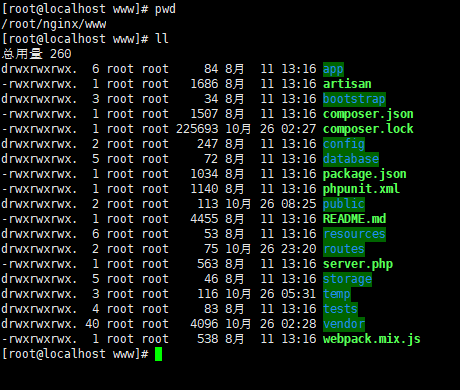
为了便于理解 /root/nginx/www 目录结构如下(将www作为项目目录):
修改 nginx 配置文件
挂载的时候,挂载了一个 /root/nginx/conf/nginx.conf 文件和一个 /root/nginx/conf/conf.d 目录
nginx.conf 文件内容如下,一般不用改
user  root;
worker_processes  1;

error_log  /var/log/nginx/error.log warn;
pid        /var/run/nginx.pid;

events {
    worker_connections  1024;
}

http {
    include       /etc/nginx/mime.types;
    default_type  application/octet-stream;
    log_format  main  '$remote_addr - $remote_user [$time_local] "$request" '
                      '$status $body_bytes_sent "$http_referer" '
                      '"$http_user_agent" "$http_x_forwarded_for"';
    access_log  /var/log/nginx/access.log  main;
    sendfile        on;
    #tcp_nopush     on;
    keepalive_timeout  65;
    #gzip  on;
    include /etc/nginx/conf.d/*.conf;
}
在 /root/nginx/conf/conf.d 目录下新建一个文件 test.com.conf 内容如下:
server {
    listen       80;

# 因为是在Windows上的VM里面运行的centOS,在CentOS上个运行的容器,所以这里我就搞了一个测试域名
    server_name  /www/php_demo/public;

# 因为将容器内的 /usr/share/nginx/html 目录映射到了宿主机的 /root/nginx/www 目录,所以在宿主机上对应的目录就是  /root/nginx/www/public
    root /usr/share/nginx/html/public;

    add_header X-Frame-Options "SAMEORIGIN";
    add_header X-Content-Type-Options "nosniff";

    charset utf-8;

    location / {
        index  index.php index.htm index.html;

        try_files $uri $uri/ /index.php?$query_string;
    }

    # 你会经常在日志中看到找不到 favicon.ico.php找不到的500报错
    location = /favicon.ico { access_log off; log_not_found off; }
    location = /robots.txt  { access_log off; log_not_found off; }

    location ~ \.php$ {
        root /www/php_demo;

# 这个之前直接复制过来的,127.0.0.1:90000 这样写 Nginx 会报一个这样的错误:connect() failed (111: Connection refused) while connecting to upstream, client: 192.168.174.1, server: test.com, request: "GET /index.php/asf HTTP/1.1", upstream: "fastcgi://127.0.0.1:9000", host: "test.com"
# 报错意思就是连接不上 127.0.0.1:9000 ,经过查看(docker ps -a),启动php-fpm容器的IP是 172.18.0.4,所以这个地方做相应的调整,也可以直接使用容器名
        fastcgi_pass   php81:9000;
        fastcgi_index  index.php;

# 这个地方也要改成到 public 目录下才行
        fastcgi_param  SCRIPT_FILENAME /www/php_demo/public$fastcgi_script_name;
        include        fastcgi_params;
    }
}
重启 Nginx 容器
docker restart nginx
访问
可以看到 laravel 欢迎页,成功,优秀
修改 env 访问 mysql 和 redis
搞个路由,搞个控制器,验证一下即可,成功,完美
报错一:数据库错误
SQLSTATE[HY000] [2054] The server requested authentication method unknown to the client
百度查找的原因是说数据库版本为 8.0+ 密码认证机制改了等,做如下修改:
# 登陆MySQL
ALTER USER '用户名'@'主机地址' IDENTIFIED WITH mysql_native_password BY '密码';

FLUSH PRIVILEGES;
报错一:数据库错误 could not find driver
原因:没装扩展,装上即可 docker-php-ext-install pdo_mysql 可以查看docker安装PHP章节参考安装扩展
报错二:redis扩展没装
# 进入容器
docker exec -it php-fpm74 bash

# 执行安装命令
pecl install -o -f redis

# 添加扩展
cd /usr/local/etc/php
cp php.ini-production php.ini
echo "extension=redis.so" >> /usr/local/etc/php/php.ini